


Microsoft Office 365 comes has a concept of groups which can be confusing for a few reasons: First, there are traditional groups that existed in Office 365 which many referred to as Office 365 Groups, then Microsoft came with an official new thing called "Office 365 Groups" and now things got more confusing.
Let's clear things up in this guide.
When you work with Office 365 you will need to understand that there are different types of groups.
Here's a list of those groups and their description.
- Security Groups - Those are groups used to control access to areas of Office 365 such as SharePoint, mobile devices, etc. Groups. Very similar to Active Directory security groups.
- Distribution Group or List - Those are groups of email addresses. This group is used to distribute information. So if you email this security group all the members of the group will receive the email. You can have people outside of your organization in this group.
- Mail enabled Security Groups - This is really a hybrid of a security group and a distribution group. So people in this group can be given access to resources as well as receive email communications when the group is emailed.
- Office 365 Groups - This is the latest innovation from Microsoft. This is a way for teams to collaborate. This gives the group works space for sharing files, calendars tasks, etc. (This is a deeper topic compared to the other groups above which we will cover here.
How Do I Manage Office 365 Groups?
If you are an administrator with Global Admin Rights, you can manage (View, Add, Remove) Office 365 Groups from the Office 365 Admin Center.
- Go to your Admin Center by going to this link: https://portal.office.com/adminportal/home
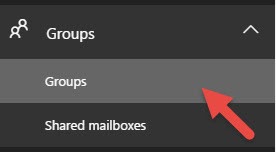
- Expand Groups, then click on Groups on the left side
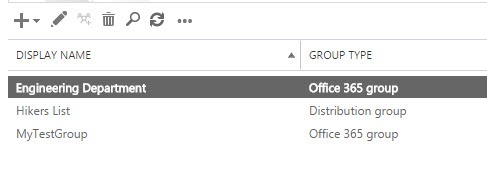
- The View will look like this
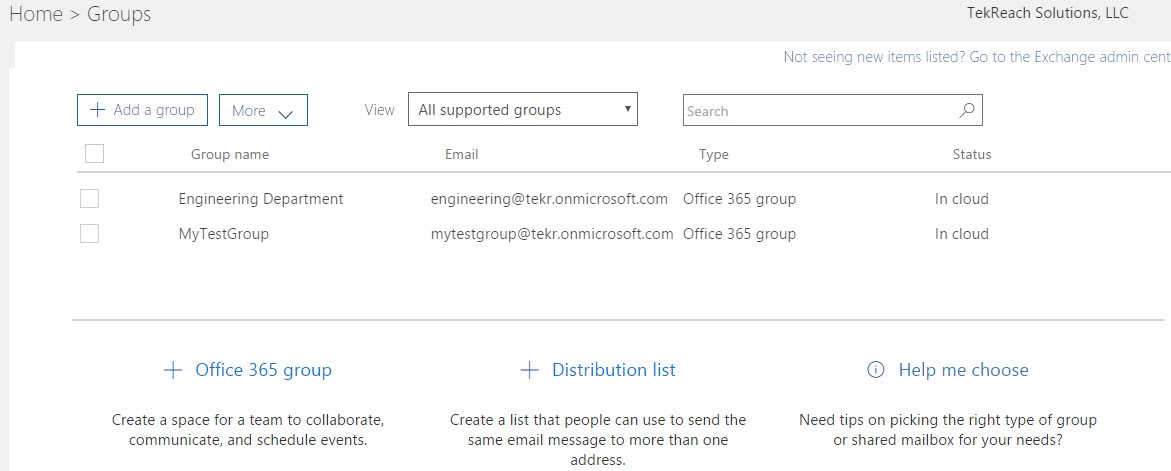
This View shows you all groups in your Tenancy (Subscription). Notice the Group Name and the Column Showing the type of group it is.
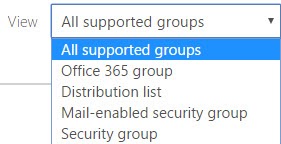
You can even Filter the group type you want to view by selecting the group type from the drop down menu:
Distribution List Group Type
The distribution list type is used to send emails to a group of people. This is done by providing the group with an dedicated email address. Emailing that address will send each individual group member a copy of the email. Responding to the group's email will send the email back to all the group members as well. A good example would be a group called "Marketing Team."
You can create those distribution groups either from the Office 365 Admin Center as shown above or from the Exchange Admin Center.
To Create a distribution group:
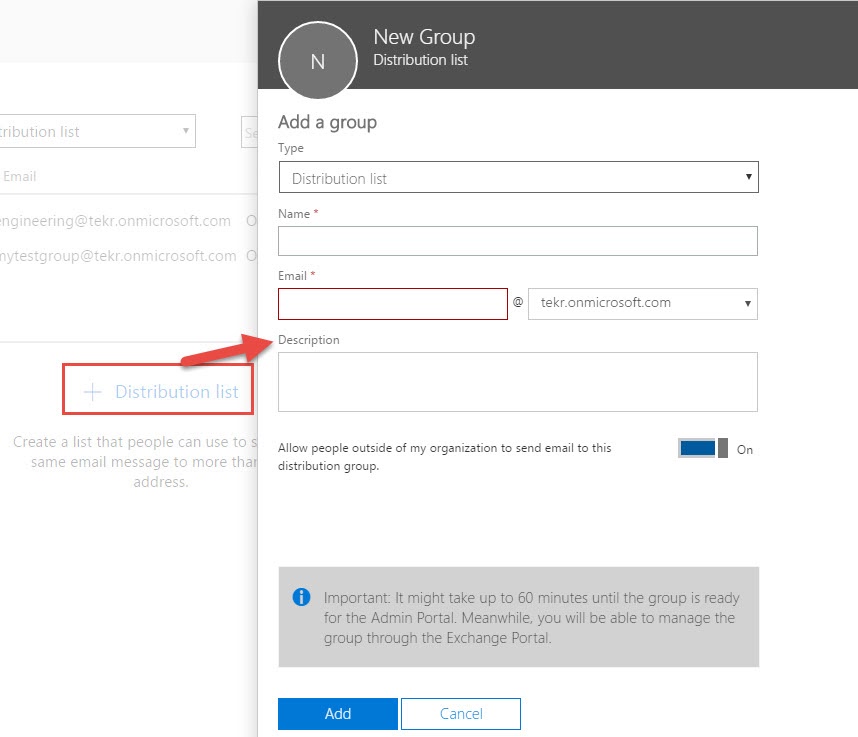
- Click on + Distribution List
- Enter The Name, Email, Description for the group.
- Specify if uses from outside of your organization can be added to your distribution list.
Once created. We can get to the group from the Exchange Admin Center.
We get to the Outlook Admin Center by:
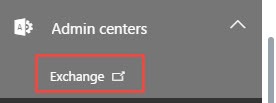
- Clicking on the left side on Admin Centers then select Exchange
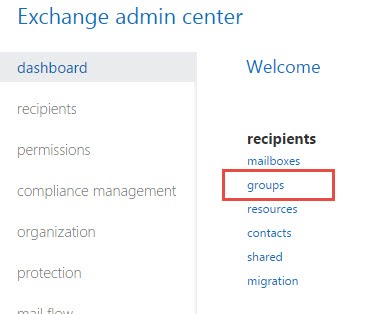
- Select Groups
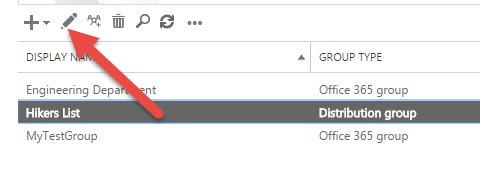
- Select the group the click Edit
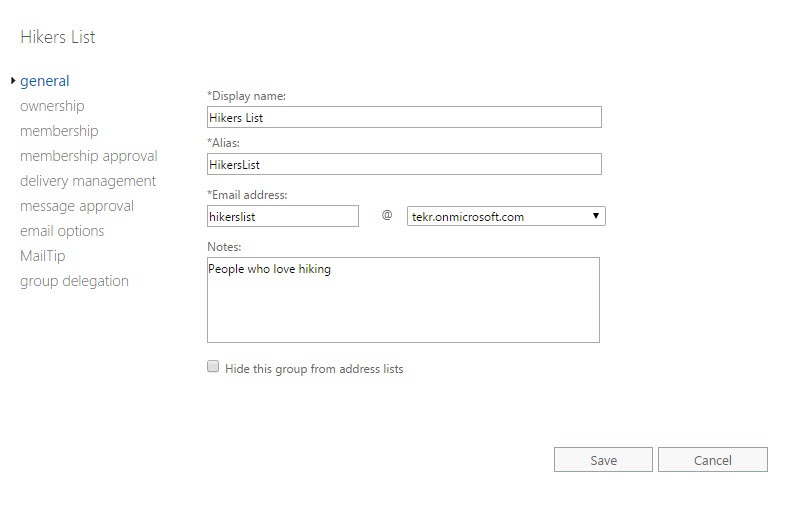
Here you will see this page which is the Exchange Group Management Page.
Exchange Group Settings
General Group Settings
Here is the General tab where you can edit:
- Name of the Group.
- Alias of the Group: This is usually a short name users can use to type in to the To field for easy access to the group. Once it's typed into the To field the group name will show. A good thing to put here would be an acronym for example for a long group name.
- Email Address. Emailing this email address will send an email to all its members
- Notes
- Hide this group from address lits may be useful if the group isn't meant to be discovered. Maybe its used by a software application.
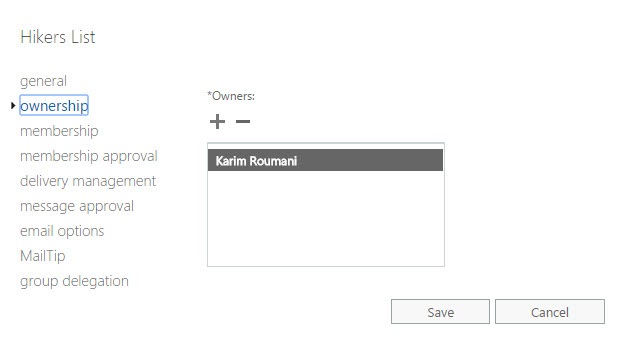
Ownership Settings
The owner for a group is the one that can change the settings on the group and manage its members.
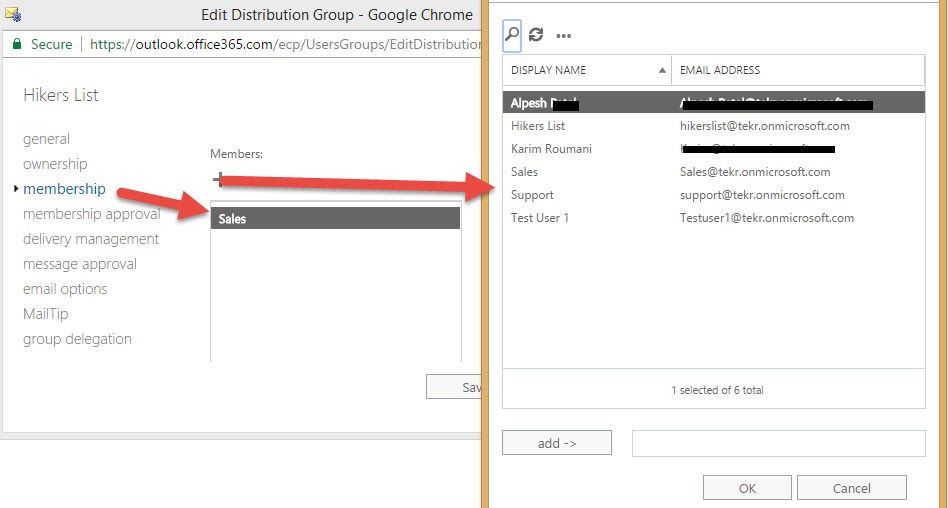
Office 365 Group Membership Settings
You can add any member you want to this group by selecting them from the directory.
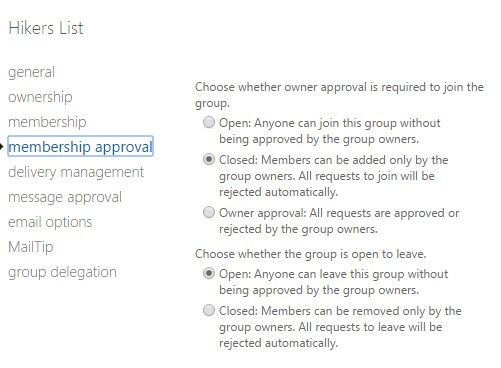
Membership Approval Settings
The on screen text here does a good job explaining those:
Screen Text:
Choose whether owner approval is required to join the group:
- Open: Anyone can join the group without being approved by the group owner.
- Closed: Members can be added only by the group owner. All Requests to join will be rejected automatically
- Owner Approval: All requests are approved or rejected by the group owners.
Choose whether the group is open to leave.
- Open: Anyone can leave this group without being approved by the group owners.
- Close: Members can be removed only by the group owners. All requests to leave will be rejected automatically.
For the last option "of choose whether the group members is open to leave" may get you thinking "why would you want to force someone to stay in a group?" If management sends emails to marketing department on an on going basis and to ensure the members get the emails it is best to force the mebers to stay in. If the group is more of hobby or an adhoc group then it makes sense for the user to opt to join or leave.
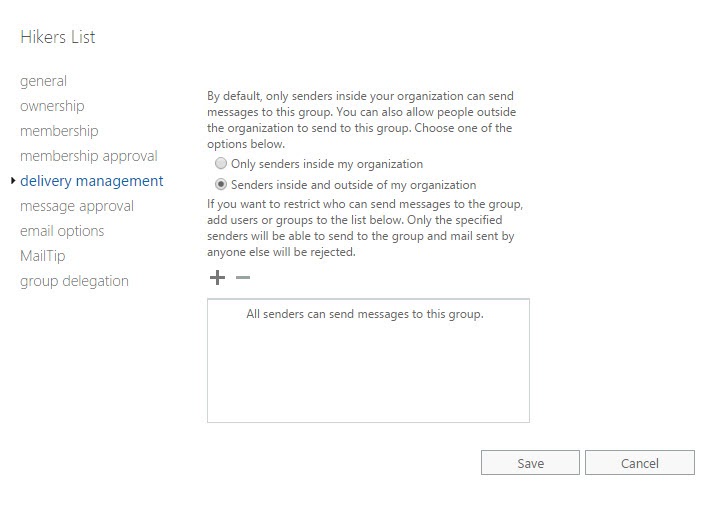
Delivery Management Settings
The delivery management option allows you to specify who can send emails to this group. The screen text does a good job explaining the options:
Screen Text:
By default, only senders inside your organization can send messages to this group. You can also allow people outside the organization to send to this group. Choose one of the options below.
Options:
Only senders inside my organization
Senders inside and outside of my organization
If you want to restrict who can send messages to the group, add users or groups to the list below. Only the specified senders will be able to send to the group and mail sent by anyone else will be rejected.
---
Message Approval Settings
Message approval allows you better monitor the incoming emails coming to this group and control what approved for delivery. You can specify the list of Moderators that can do the screening of incoming messages. You can even specify an exemption list of users who can send messages without the need for approval.

Email Options Settings
In the email options settings you can modify the reply to address of the group. If a message comes from the group, it may have different reply-to address than it's default address.

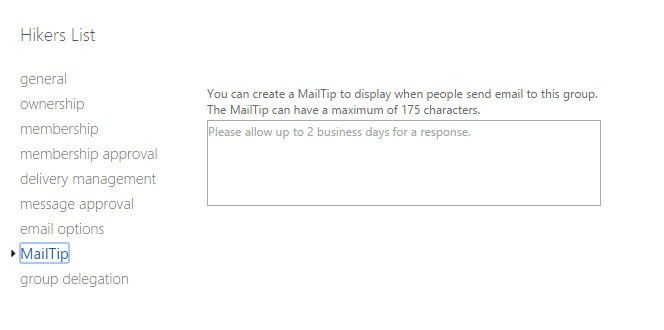
Distribution Group MailTip
MailTip is a small description that appears for users in Oulook when they select the email address of the group in the To, CC, or BCC field. It is a tip that provides additional comments admins want you to know about this group. The screenshot here shows you how it appears in Outlook.
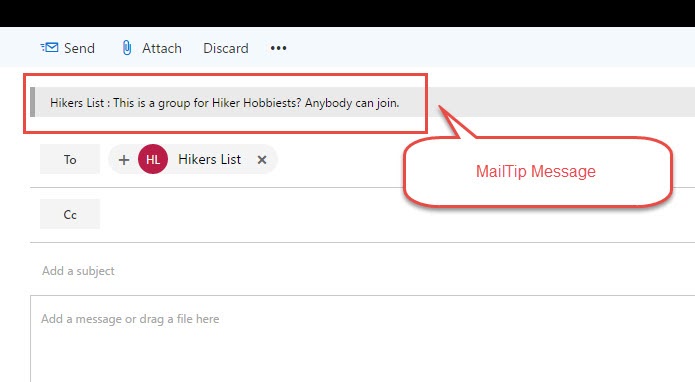
To Set the MailTip description Click on MailTip and type in a small description for users to see.
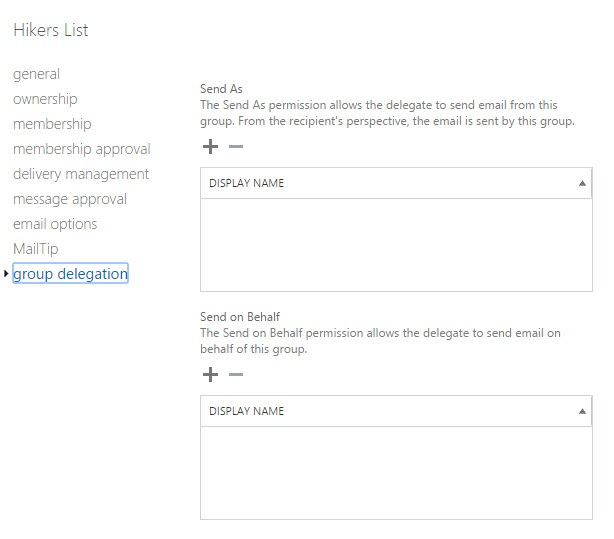
Group Delegation Settings
Group Delegation settings allow you to specify who Send As and Send on Behalf delegates. But what does that mean?
A delegate is simply a user you specify. If you Make User John a "Send As" delegate to this group. Then John can send a message using this group and the emails going out will show that it was sent by the group name, not by John.
Send on Behalf delegate on the other hand allows the delegate (or user) to send an email via the group, however the From field of the message will show "John on Behalf of Group Name". The individual sender's name is revealed.
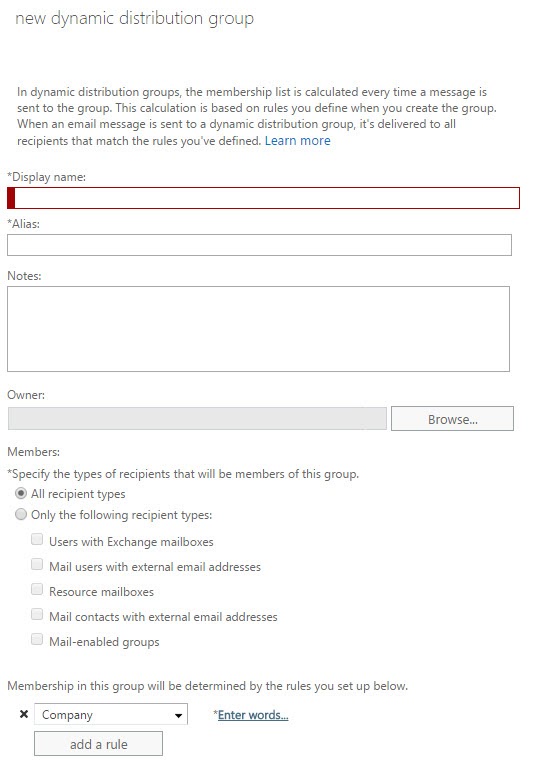
Dynamic Distribution Groups
Dynamic Distribution act as regular distribution groups, again mainly for communication, except the dynamic part means that the group membership can change dynamically based on set rules. Those rules are mainly driven from properties and attributes of users. For example, you can create a dynamic distribution group for marketing with a rule as follows:
Department 'contains' Marketing.
This in turn would pull in every user whose department attribute contains marketing.
Security Groups
Here' let's talk about regular security groups. Not mail-enabled ones. Note that those are used not by end users but by admins to set permissions on resources. For example a security group could be called "Executives" and you can grant this Executive group full permissions on a folder related to the Executives. You will not be able to email this security group.
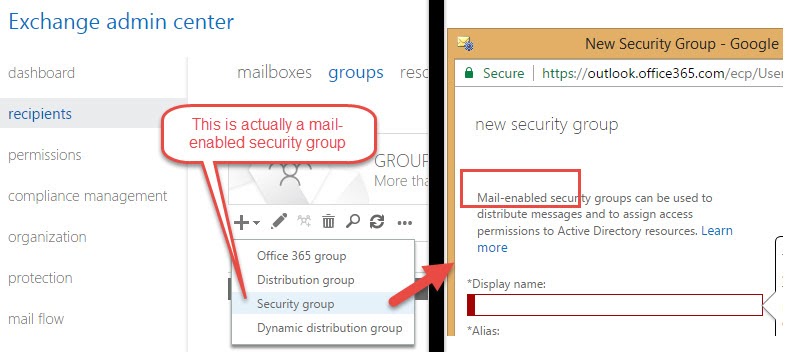
Note that security groups can only be created from the Office 365 Admin Center and not the Exchange Admin Center. Although the Exchange admin Center shows the option to create a security group, it actually only creates a Mail-enabled security group.
To create this group.
- Goto Office 365 Top Level Admin Center
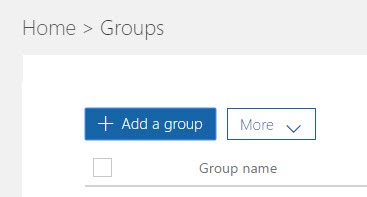
- Click on Groups -> Groups
- Create New Group
- Select Security Group from drop down
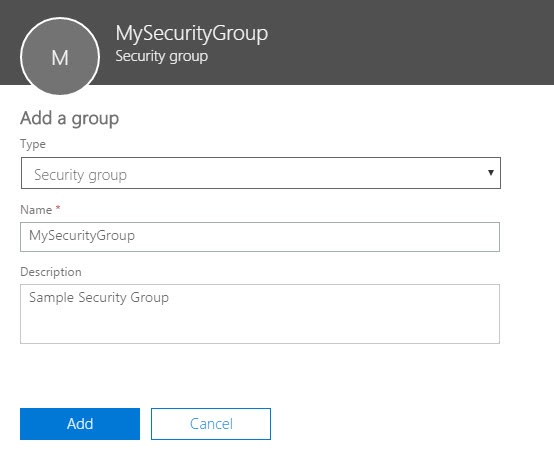
- Specify a Group Name
- Specify a Description
Once Created How Exactly Do We Use Them?
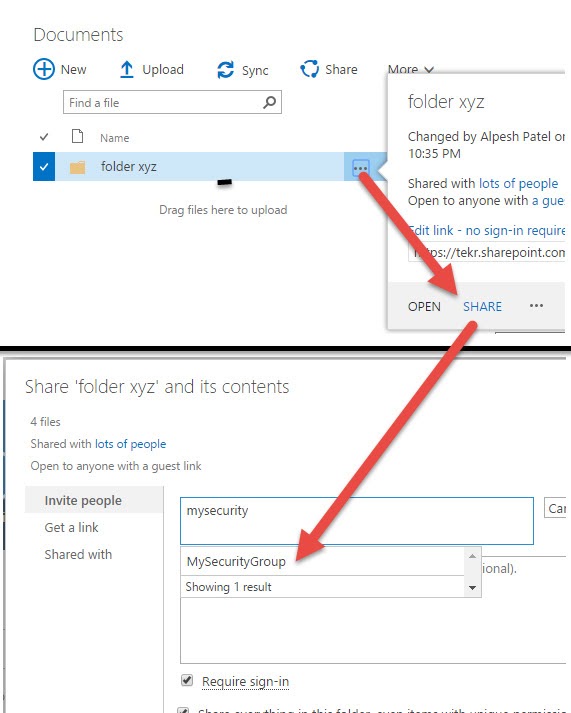
Well, any place in Office 365 that you can assign a permission or share something you can pretty much use this group to assign it permissions. For example let's do that to a SharePoint folder.
We Go to SharePoint, select Share on folder, then start typing in the new security group and it shows up. Those are very identical to Active Directory Security Groups.
Note again that if look under Exchange Admin Center. This new group does not show up there:
Navigational Tip
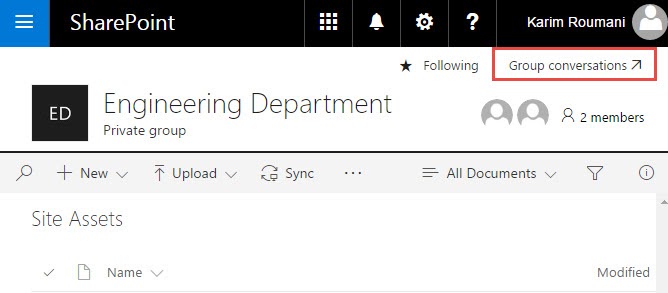
When you navigate to a SharePoint site from Office 365, you lose the ability to navigate to other areas of that group such as conversations, etc.. However at the top right of the SharePoint site, you see the "Group Conversations" link with an arrow. This will take you back to the group site.
How to Add Members to a Security Group in Office 365?
To add members to a security group in Office 365:
- Go to the Admin Center
- Click on Groups -> Groups
- Click on the Security Group
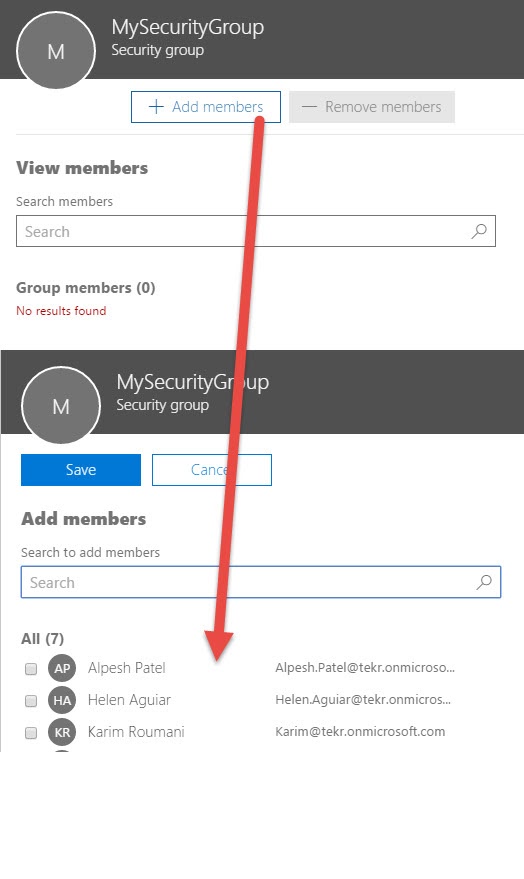
- On the Right Select Add Members
- You will see a list of members, select the ones you want to add or search and click save.
Mail Enabled Security Groups
Mail Enabled Security Groups, just like regular security groups can be granted permissions and access to various resources inside Office 365 such as folder, mailboxes, etc.. However, unlike regular security groups, those mail-enabled security groups can be used as a distribution group as well. So we can send them emails. Each mail-enabled security group will have its unique email address.
Creating a Mail-Enabled Security Group
Creating a mail enabled security group can be done from Office 365 Admin Center or from the Exchange Admin Center. However managing the properties and settings is better done in Exchange Admin Center as you see more options there.
To Create a Group
- Go to Office 365 Admin Center
- Click on Groups - Groups
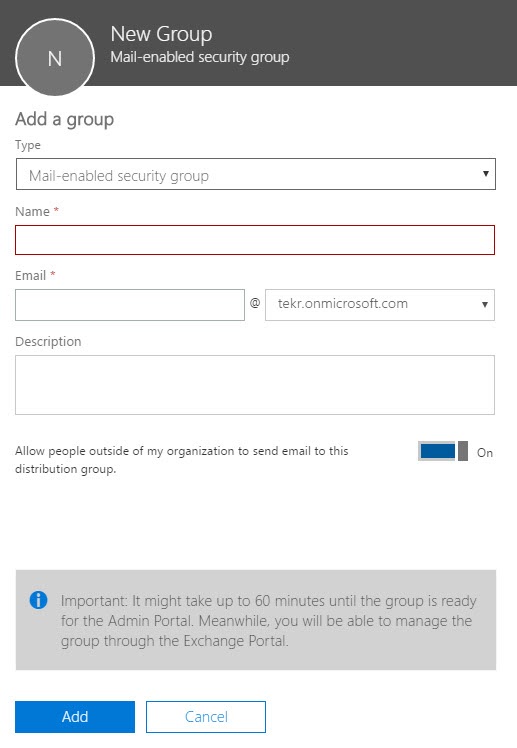
- Create and Fill out the form as seen below.
Editing the Settings and Properties of the Group
To edit the properties and settings of the mail-enabled security group, you are better off doing that in Exchange Admin Center. We already covered the options and settings here for distribution lists and groups and they are the same. So you may reference the Distribution Lists management above.
Office 365 Groups
"Office 365 Groups" are a new group type introduced by Microsoft. This time it's official name is "Office 365 Group" and the goal behind is to improve team collaboration. This is done by providing group members with Document Workspaces, Discussion boards and Shared Tasks.
So What are Office 365 Groups and how exactly do they work?
First unlike the other group types, Office 365 Groups can be created by anyone in your organization who has an Office 365 Login and it doesn't have to be an administrator.
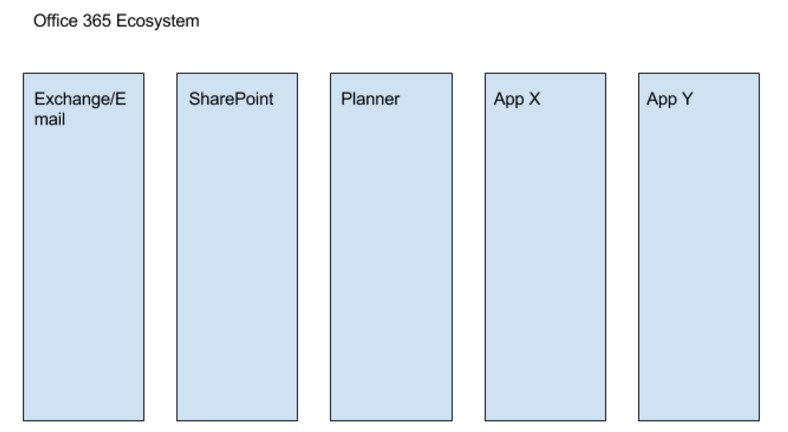
Also, note that Office 365 Groups are not a brand new technology for sharing files and collaboarting, rather it leverages all the existing Office365 apps and tools to do its magic. To calrify, Office 365 comes with some services such as Exchage, SharePoint, Planner, etc. per this diagram.
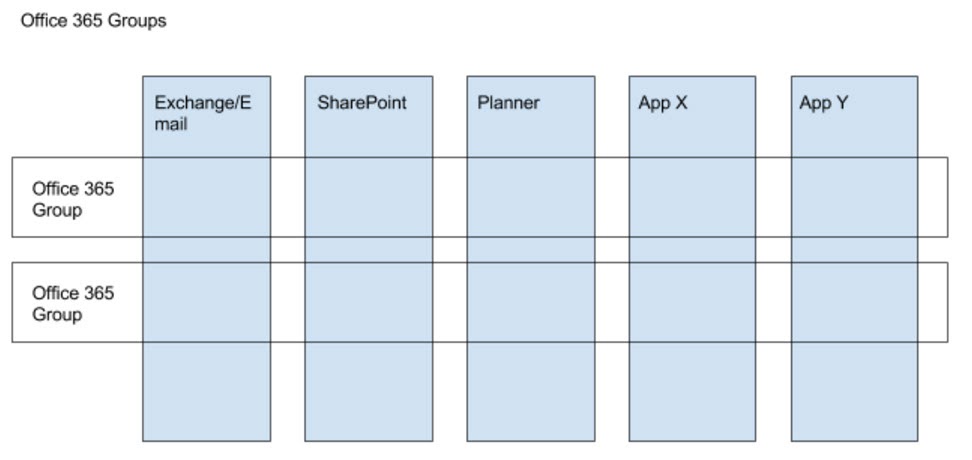
And Groups is nothing but a bucket that spans those apps. So Group members have the immediate capacity of sharing files, exchanging discussions and planning tasks and projects amongst each other.
So what does that like look like in the UI?
Here is a home page area of a group. Notice that the group's menu shows what the group provides. It provides access to conversations, Calendar, Files, Notebook, Connectors, Planner and Site.
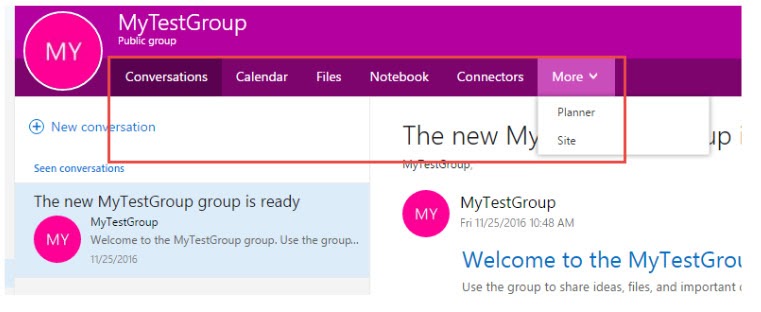
Clicking on any of those links simply takes you to the Office 365 app corresponding to that area. To be specific:
- Conversations are Exchange Shared Inbox.
- Calendar is a good old Exchange Calendar
- Files are a rollup of files stored in SharePoint
- NoteBook is simply a OneNote file stored in a SharePoint library.
- Planner is a Task Planner App.
- Site is simply a link to the Group's SharePoint site collection.
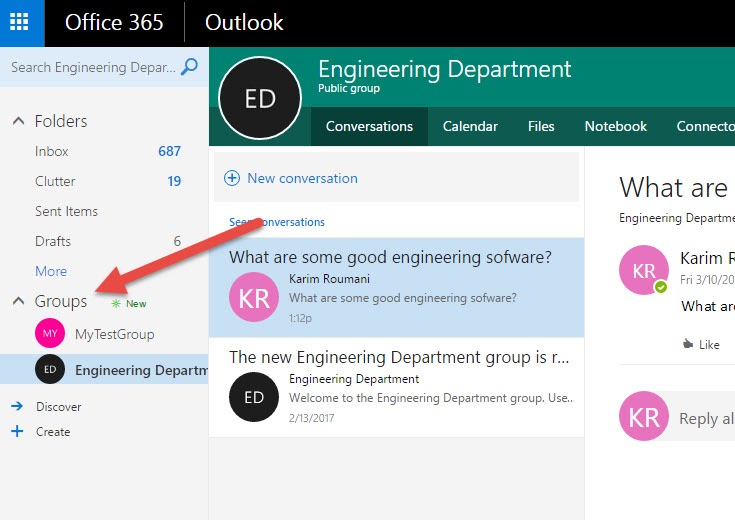
You will notice clues that this Office 365 group is an idea that Microsoft is planning on pushing strongly. You will see that because it's something that shows up on the left side of the screen on any area of Office 365 that applies. So if you are a part of the hiker's group, then anywhere you go you'll be able to click on it and get a slice of content that relates to the hiker's gorup.
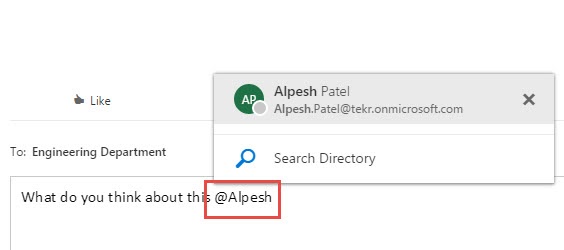
Using Handles in Conversations
Much like modern social tools, conversations in Office 365 groups support user handles in the conversation text. User handles are an easy way to bring someone you want into the conversation by typing their name. An example can be seen below. Simply typing @ will pull up a list of all users. Once you submit the message, the user will be notified that they were mentioned and can then participate by replying.
Office 365 Group Connectors
Office 365 Group connects are a very powerful tool for your team to be able to connect to 3rd party services and view information right within Office 365. Those 3rd party apps essentially send a report or emails to your group that you subscribe to and your team is able to discuss those messages. Your team can be on the same page when following the latest Twitter tweets from relevant hashtags or accounts your team wants to follow. You can connect to Asana for task management.
Note that those connects simply applow those 3rd party apps to send notifications and updates to discussions but it will not allow your team to update content on those 3rd party services.
Lets Connect Twitter
We select Twitter and are presented with the information below to complete the connection. It asks us what handles and hashtags we want to follow.
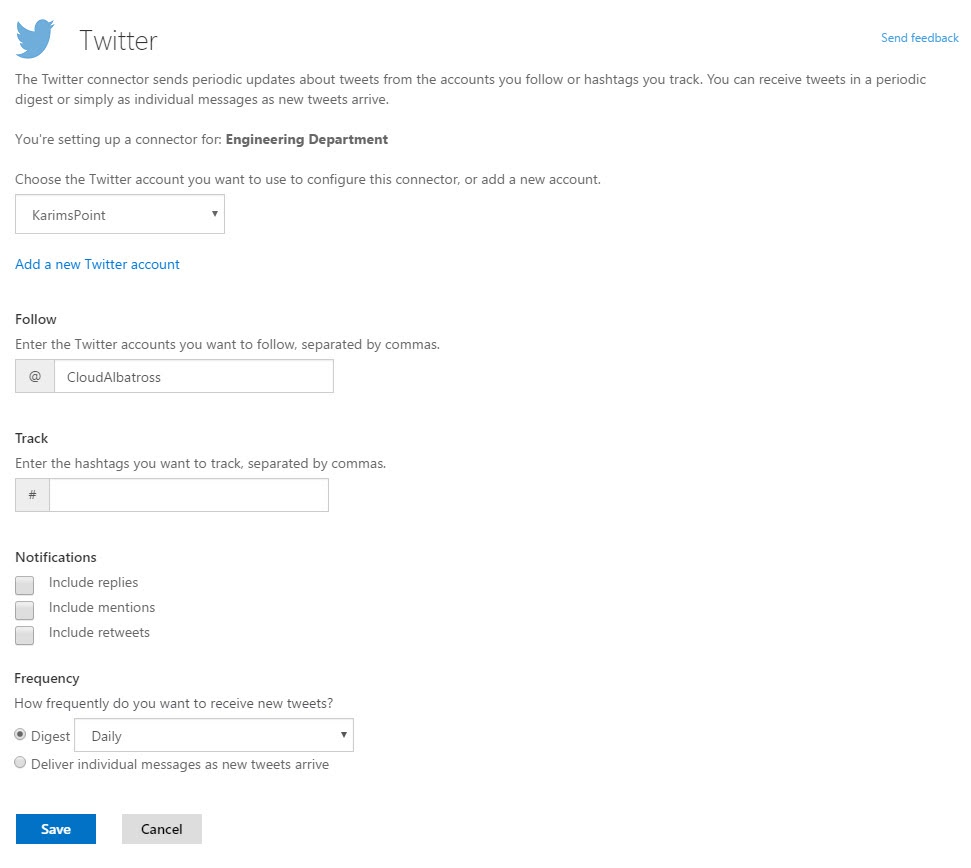
After Clicking Save. The connector starts sending items relevant to our interest to the conversation threads and adding new conversations as new tweets appear.
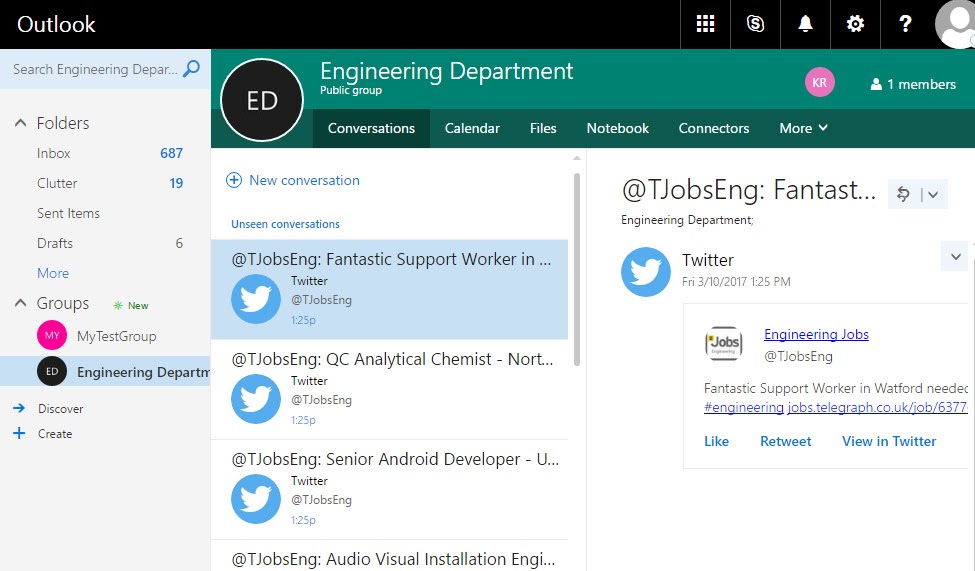
Of course that could be too much clutter, but you can create digests instead as well where one conversation contains many tweets.
How to Create an Office 365 Group
Office 365 groups can be created by anyone in your organization. Although this may ruffle some feathers amongs admins, there is a reason for it which we cover below. Also, note that with Powershell there is an option to turn of the ability to create groups.
Creating groups is easy:
- Go to Outlook
- Right Click on Groups on the left menu
- Click Create

How to Join and View an Office 365 Group
To discover groups and join them, you can do that from Outlook.
- On the left side pane, right click on Groups, then click Discover.
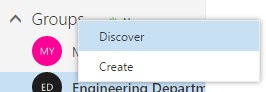
- Select All Groups
- Start Searching or scroll through the list of available groups
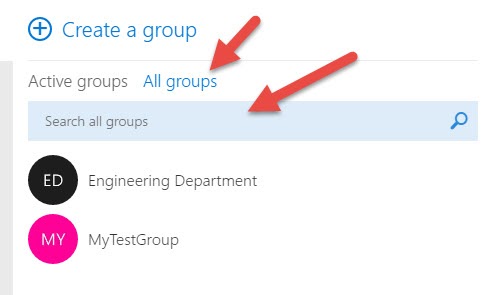
- If you like the group you are viewing you can join it if it's a pulic group
Note that you can participate in discussion in groups without joining them if they are public groups. Joining the group will allow you to receive notifications of updates on the group.
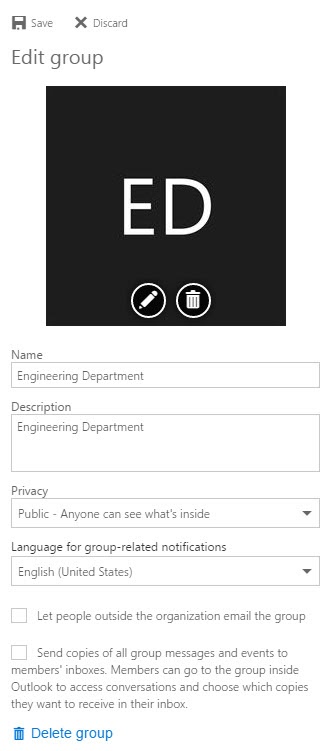
Edit Office 365 Group Settings
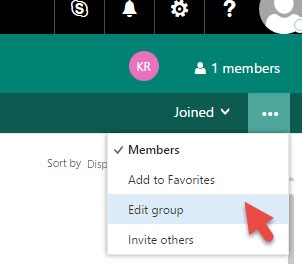
Editing a group is done right from the group page. Simply click on the ... on the top right then Edit Group.
Office 365 Groups and its Relationship to SharePoint
When a new Office 365 Group is created, a number of things happen in the background. One of which, a SharePoint Site Collection gets created for that group in the format https://yourdomain.sharepoint.com/sites/[groupname]
To prove that, in the group on the top menu we click on More - Site.
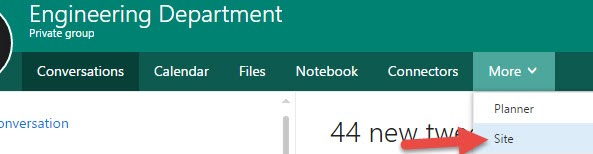
This Takes us to the SharePoint site I mentioned. And notice the URL update to say engineering

Something may be strike you as strange though if you go into the list of site collections under the SharePoint Admin Center. That site is not listed there even though it is a SharePoint site collection. This is by design. The idea in my opinion is that the group is a collection of different services all connected together and an admin should be able to delete say a SharePoint site that belongs to that group. The owner of the group is the sole governer of that group and all its elements.
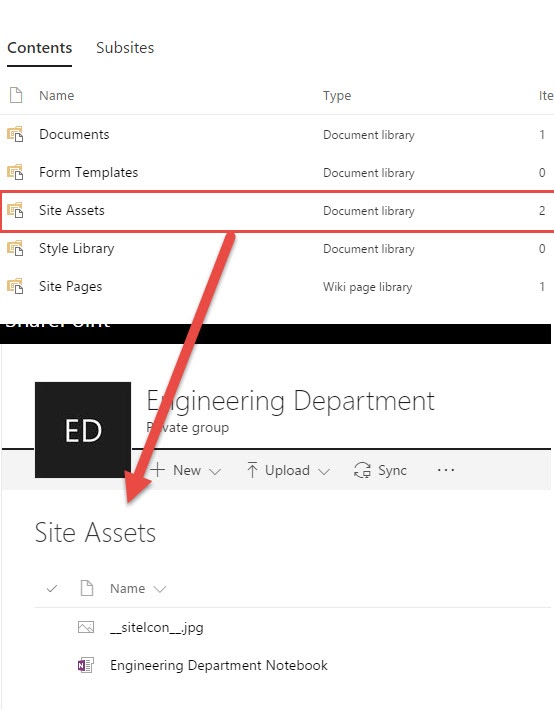
Also notice that if we click on Notes in the menu it opens OneNote, which is simply a item in the Site Assets library of the connected SharePoint site.
Office 365 Group Mindset
Let me touch up a little on the Office 365 Groups and the mindset you should have since I can see how many admin can see them as a room for chaos, or a open space for users to create unorganized mess of content. Etc..
Back in the day when O365 groups weren’t available, users relied on IT to create those workspaces for them. The users often got frustrated with that process because IT would take too long, or would need more bureaucracy to create a SharePoint site, etc.. or ultimately users found their own way of getting things done by using dropbox, and the like to share the content they need with each other. The biggest difference here is that it was an on demand workspace vs a very annoying process for the end users. Microsoft said you know the truth is that this trend can’t be ignored, users can’t be micromanaged, they need to get their job done! So instead of going against company policy and putting those files all over the place outside of company jurisdiction, they said lets create a friendly, company collaboration space that are nimble and user friendly and solve the data creep problem.
With the data now moving under office 365 groups, where it is under company jurisdiction, and out drop box and the like, there is this overhead on IT and content managers to policy the content and determine when it should deleted, archived, etc.
You might say well now there is this extra overhead we have to deal with and it was better before when they were using Dropbox… Well Not really! Using Dropbox meant that once employees came and went content was lost with them so that was a problem, content was not searchable or nowhere to be found. Secondly it was most likely non-compliant with many company policies. No company wants it’s data scattered around the Internet and people's computers. So really, the cost savings from the lack of overhead of content management was a inadvertent consequence from the lack of enforcing those company policies. So those are not savings you should be happy about.
What's Next for Office 365 Groups
There are much investments and excitement around the new Office 365 groups and some of the new things to look for are:
- Support for Outlook for iOS and Android
- Auto Expiring Groups Feature
- Upgrade from Distribution List to an Office 365 Group
- Policies around preservation and deletion of groups


-01.webp)

%20(Small)%20(Phone).jpeg)
